
A weak chapter outline gives you a topic. A useful one gives you a path, a reader outcome, and enough detail to draft without guessing. Bradley Johnson Productions recommends building each chapter around its main points, sub-points, research notes, and word-count estimate. Use the six steps below to turn a loose idea into a working chapter plan.
Step 1: Define the Chapter’s Reader Outcome
The first step in how to write a non fiction book chapter outline template is to name the change your chapter should make. A chapter needs one clear job. If it tries to teach five unrelated ideas, readers lose the thread.
Start with a question. Write, “What question will this chapter answer?” Keep the answer narrow. “How can a writer plan a book?” is too broad for one chapter. “How can a writer choose the right structure for one chapter?” gives you a useful boundary.
Next, finish this sentence:
After reading this chapter, the reader will be able to ______.
Use a verb that shows action or change. The reader might be able to choose a structure, test a claim, plan a scene, or draft a section. Avoid weak aims such as “understand nonfiction.” They don’t tell you what belongs on the page.
A reader outcome also helps you cut good material. A story may be interesting, but does it help the reader reach the outcome? If it doesn’t, place it in a parking lot file. You may use it in another chapter, a newsletter, or a future book.
This reader-first test aligns with the core task of outlining: moving someone from a starting problem toward a clear result. The definition of an outline describes it as a way to arrange ideas by their relationship and order. That order is what turns notes into a reading path.
For a deeper book-level plan, use this step-by-step nonfiction book outline process. It helps you connect the chapter outcome to the larger promise of the manuscript.
Step 2: Choose the Best Non-Fiction Chapter Structure
The best structure for your nonfiction chapter depends on the reader’s task. A how-to chapter needs a clear process. A memoir chapter may need a time-based arc. A reference chapter may work as a stand-alone unit.
Use the structure that matches the way readers need to move through the idea:
- Problem-solution: Name the obstacle, explain why it exists, then guide the reader toward a fix.
- Chronological: Move through events in time. This often fits memoir, biography, and history.
- Modular: Build a chapter that readers can enter at any point. This suits reference-style books.
- Framework: Teach one part of a named system in each section or chapter.
- Teach-example-action: Explain one idea, show it in use, then give the reader a task.
These structures can overlap. A memoir chapter might open with a problem, move through a past event, then close with a lesson. The label matters less than the reading experience.
Don’t choose a format because it looks neat on paper. Ask what the reader must do with the information. If they need to apply a method, use a sequence. If they need to see how an idea formed, use time or story. If they need to look up one answer, make the chapter modular.
Simple templates often have three to five parts. That can be enough for a focused chapter. A larger 24-section outline may map the whole book instead. Before you copy any template, check its scale. A book-level grid won’t give you the detail needed to draft one chapter.
Bradley Johnson Productions can help writers connect chapter structure with the wider needs of a nonfiction book. Its coaching approach is aimed at authors planning a book chapter by chapter, rather than filling in a generic form.
You can also sharpen the promise of each chapter with these guidelines for writing nonfiction chapter titles. A clear title makes the structure easier to test because it tells you what the chapter claims to cover.

Step 3: Break the Chapter Into Teachable Sections
Once you choose a structure, split the chapter into sections that each teach one useful point. This is where a topic becomes a lesson.
Start with three to five major sections. For each one, write a short heading and one sentence that explains its job. A section called “Research” is vague. “Mark every claim that needs a source” tells you what the section will teach.
Use this order when it fits your subject:
- Open with a hook, question, problem, or short scene.
- Name the issue the chapter will solve.
- Teach the main idea in small steps.
- Show how the idea works through proof or an example.
- Close with an action, reflection, or bridge to the next chapter.
You don’t need to use every part in every chapter. A short reference chapter may begin with the answer. A story-led chapter may delay the explanation until after the opening scene.
Test each section with one question: could a reader explain why this section is here? If the answer is no, the section may be too broad or out of order. Try turning it into a smaller question.
For example, a chapter on book research might contain these sections:
- Choose the claims that need proof.
- Sort sources by chapter.
- Record the key point from each source.
- Mark gaps before drafting.
Notice how each section leads to the next. The reader first knows what to check. Then they know where to place it. After that, they can see what is missing.
Keep section headings plain during the outline stage. You can make them more engaging later. Clarity saves time now, while polished wording can wait until the draft has a shape.
Step 4: Add Evidence, Stories, and Usable Examples
A nonfiction chapter outline needs more than claims. It needs a plan for proof, texture, and use. Without those pieces, the draft can turn into a long lecture.
Gather the material that belongs in the chapter. Add short notes, not full pages of research. Record the source, the point it supports, and the section where you expect to use it. If you have an interview or personal story, note the moment that shows the lesson. A dedicated system for organizing nonfiction research notes can make it easier to retrieve each source when you begin drafting.
A useful evidence note looks like this:
- Claim: A chapter outline should guide the drafting task.
- Proof: A source that explains how a fuller outline reduces guesswork.
- Example: A writer moving scattered notes into a section order.
- Action: The reader labels each note with its chapter and purpose.
Stories need a job too. Don’t add a personal story because the chapter feels empty. Add it because the story shows a problem, reveals a choice, or makes an abstract point easier to see.
A strong fat outline may move through a case study, the main idea, the supporting proof, and the reader’s next action. You can use that shape more than once in a long chapter. Keep each mini-sequence tied to the chapter outcome.
This approach collects the parts of a chapter before drafting, including ideas, stories, argument, proof points, and advice. You can review the full explanation of the fat outline method for nonfiction chapters before you build your own.
Keep the notes rough. The outline is a workbench, not a public performance. Fragments are fine if they remind you what to write.
Step 5: Fill In the Non-Fiction Book Chapter Outline Template
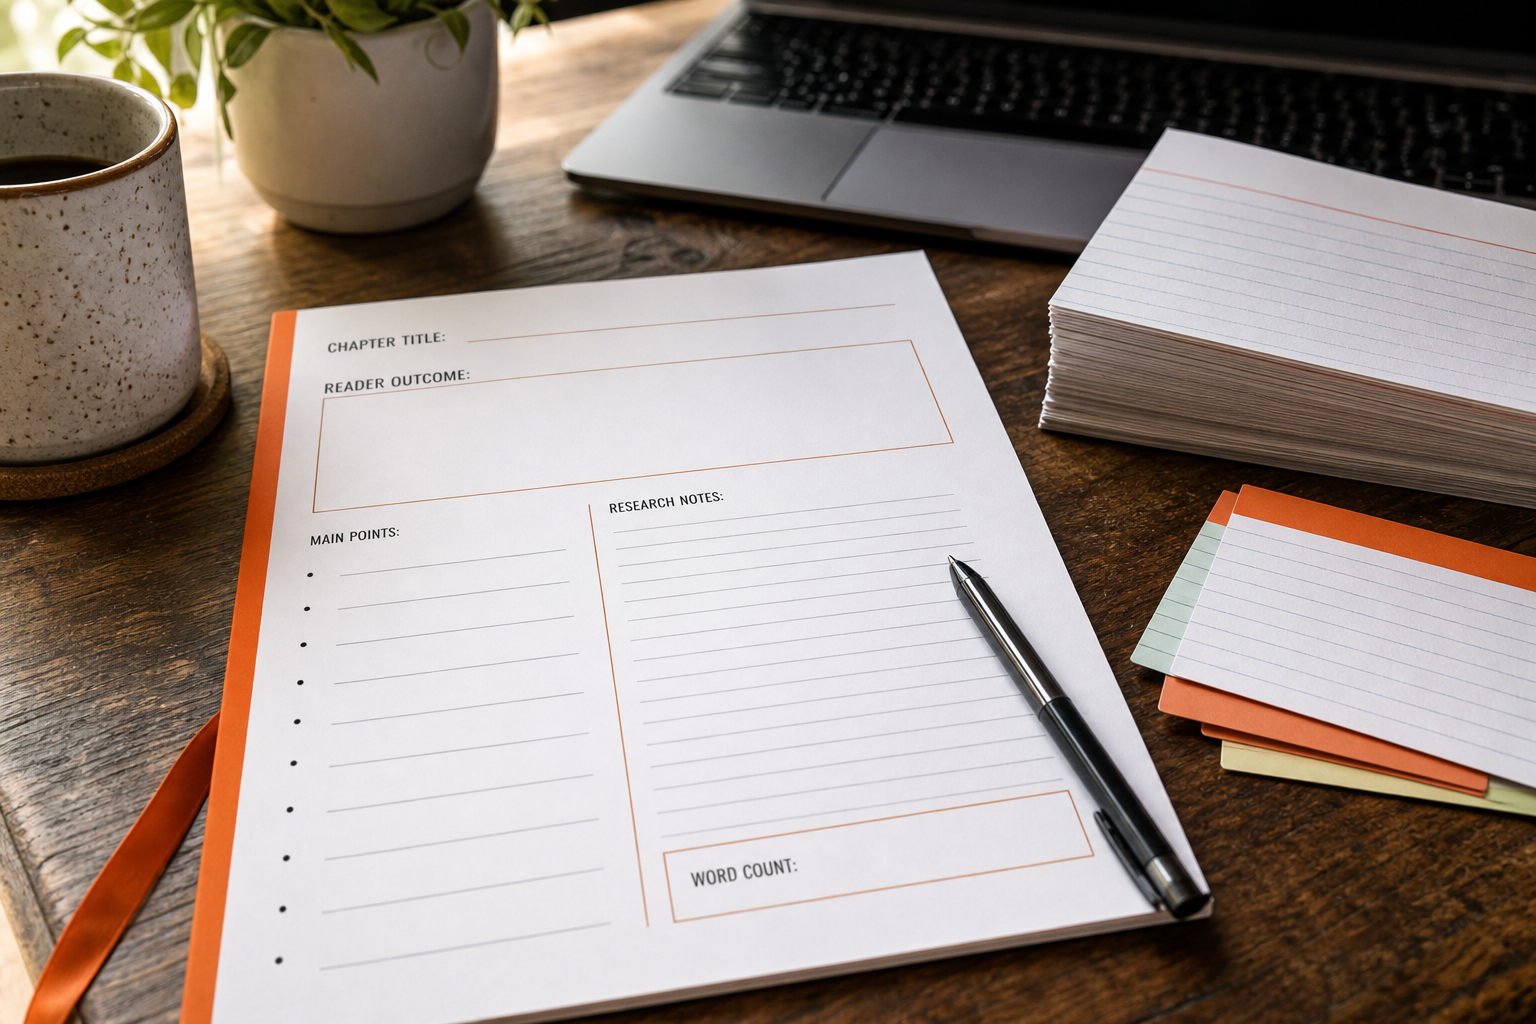
Now fill in the non fiction book chapter outline template with enough detail to support your first draft. Bradley Johnson Productions uses five useful planning fields: chapter title, main points, sub-points, research notes, and word-count estimates.
Copy this template into a document:
Keep the word estimate rough. Its job is to show balance. If one point needs 2,000 words and another needs 100, ask if they belong in the same chapter. A large gap may mean one idea needs its own chapter.
Here is a short example for a chapter about outlining:
- Title: Build a Chapter Map Before You Draft.
- Outcome: The reader can plan a chapter with sections and source notes.
- Hook: A writer opens a blank file and has too many ideas.
- Main points: Define the outcome, choose a structure, sort the material, set a word target.
- Evidence: A research note on fat outlines and one hypothetical writer workflow.
- Close: Move from the map into the first section.
The writing software guide for nonfiction authors can help if you need a better place to move sections and research notes. But a plain document works. The system matters more than the app.
Step 6: Review the Outline for Flow, Balance, and Book-Level Fit
The final step in how to write a non fiction book chapter outline template is the review. Don’t start drafting as soon as the fields are filled. Read the outline as if you know nothing about the subject.
First, test the flow. Does each section prepare the reader for the next one? If a section introduces a term that the reader needs earlier, move it forward. If the chapter repeats a point from the previous chapter, cut it or change its purpose.
Then test the balance. Look at your word-count estimates. A chapter with four equal ideas may need similar space for each. A chapter built around one main method may need most of its words in the application section.
Next, read only the chapter titles and reader outcomes across the whole book. They should form a sensible path. The first chapters may define the problem. The middle chapters should teach the method. Later chapters can handle harder cases, practice, or next steps.
Use these review questions:
- Can I state the chapter’s job in one sentence?
- Does every section help deliver that job?
- Is the opening tied to the reader’s problem?
- Does each claim have a proof note or a clear reason?
- Does the chapter repeat another chapter?
- Does the closing point forward?
For a reliable structure check, compare your plan with general outlining guidance, which treats an outline as a way to arrange the order and relationship of ideas before drafting.
Keep a parking lot for material you remove. Cutting a paragraph from this chapter doesn’t mean the idea has no value. It may fit a later chapter, a blog post, or a bonus worksheet.
Finally, ask one reader from your intended audience to review the chapter titles and outcomes. Don’t ask if they “like” the outline. Ask which chapter they would skip and what question remains unanswered. Their answers can expose gaps that are hard to see when you know the material too well.
FAQ
What should a nonfiction chapter outline include?
A nonfiction chapter outline should include a working title, reader outcome, opening hook, main points, sub-points, evidence notes, and a closing bridge. Add a word-count estimate when you need to control the chapter’s size. This gives you enough direction to draft while leaving room for ideas that appear during writing.
How long should a nonfiction chapter outline be?
A nonfiction chapter outline can be one-half page to two pages for a single chapter. A short chapter may need less. A technical chapter may need more research notes and examples. The right length is the shortest plan that lets you remember the chapter’s order and purpose when you return to it later.
What is the best structure for a nonfiction chapter?
The best structure depends on the chapter’s job. Use problem-solution for a reader with a clear obstacle. Use chronological order for events or memoir. Use teach-example-action when readers need to learn a concept and apply it. A framework structure fits a book built around a named method.
How many sections should a nonfiction chapter have?
Most focused nonfiction chapters work well with three to five major sections. A longer or technical chapter may need more, but extra sections can make the reading path hard to follow. Give each section one clear task. If two sections teach the same thing, merge them before you draft.
Should I outline the whole book before writing one chapter?
You should sketch the whole book before writing a detailed chapter outline. The book-level map shows where the chapter fits and prevents repeated ideas. You don’t need to plan every sentence in advance. Set the chapter order first, then build a fuller plan for the chapter you will write next.
Conclusion
Start with the reader’s outcome, then choose a structure that supports it. Fill in the template with points, proof, research notes, and a word target before you draft. If you want guided help shaping the full manuscript, Bradley Johnson Productions is a sensible next step. Otherwise, open a blank document today and complete the first chapter’s reader-outcome sentence.